It will not be in game-ready condition when you buy a new glove. As a Baseball or Softball player, the first question and search you will have in your mind after having a new mitt is, “How to break in a Catcher’s Mitt”?
Then this article is a perfect one for you. Here I will help you understand how you will break in a catcher’s mitt. From the best way to break in a glove to what not to do for a break-in. I will also put some most recent posts and videos linked to this article.
Let’s dive in to catch hard pitches with a perfect catcher’s mitt.
What is the Break-In of a Catcher’s Mitt

Most things need to go through some process to be ready for use. You can not just buy something and start using it.
The same thing goes for catcher’s gloves or mitts too. Every glove has to go through some simple process to be game ready. You must invest some necessary time to use its full potential. Otherwise, you can feel the delay or some hesitation during a catch.
The whole gloves break-in is mainly known as Break in gloves. And the time is addressed as a Break in period.
Why you should have Broken In Gloves

Do you know why leather-made gloves are in high demand? Because of its durability and flexibility. And those leather products give a premium vibe and make it valuable.
But new leathers are not flexible until it goes through a break-in period. The leather standard of the new Baseball glove also stayed rock-hard before use.
A catcher’s mitt is usually made with cattle leather. But some companies also use Camel and Kangaroo leather to make it more durable.
However, if you try to catch a ball with a brand-new glove. Then you will know it is tough to squeeze the glove (almost impossible). And the ball will mostly bounce off your hand.
If gloves are made with artificial leather, they may not require any break-in period. But a leather glove made with Cow-Hide, Camel Skin, or Kangaroo Skin needs time to make it flexible and comfortable. And the break-in time mainly varies on the leather grade.
Suppose you think about wasting time during the break-in period when synthetic leather-made gloves can save the break-in time and effort. Well, the time you are investing in a genuine leather-made glove can offer you more features than a synthetic one.
How to Break in a Catcher’s Mitt – The Best and Natural Way

So, how are you going to get your mitt game ready? Want to throw it under a truck to break in?
Do you know most professional players do not allow anyone to use their gloves? This is also known as Norman’s Rule.
See, when you break in a glove, the glove is mostly taking your hand’s shape. The break-in kills the stiffness and stretches the leather on your hand according to the form. Later it will feel like a part of your hand. And sometimes you even forget that the new mitt is in your hand. However, if someone uses your mitten, it can change the internal pocket shape.
Now, there are many ways to break in a catcher’s mitt and enhance the quality. But the simplest way is to catch balls with it continuously (playing catch in a catch-bullpen or standing against a pitching machine).
It can be quick catches with time and reps. You will have a custom-fitting pocket, the way you catch the ball. This will help the glove to form the hand shape naturally. Overall this will also help you to form your great catching technique in the long run.
Apart from this, there are many other shortcut methods to do the break-in. But those may not be that much efficient.
In this article, I have listed many more methods for the break-in. But for a break-in, the best possible way is to use it in the field. As a catcher, playing catch with it will not affect the leather condition. But other shortcuts can defect the leather if you can not apply the process correctly.
So, go to the field, and try to catch the ball in the pocket. This will give you a perfect break-in and four to five years of service.
For a quickest break in to your glove follow the link || Break in a Baseball Glove under Five Minutes
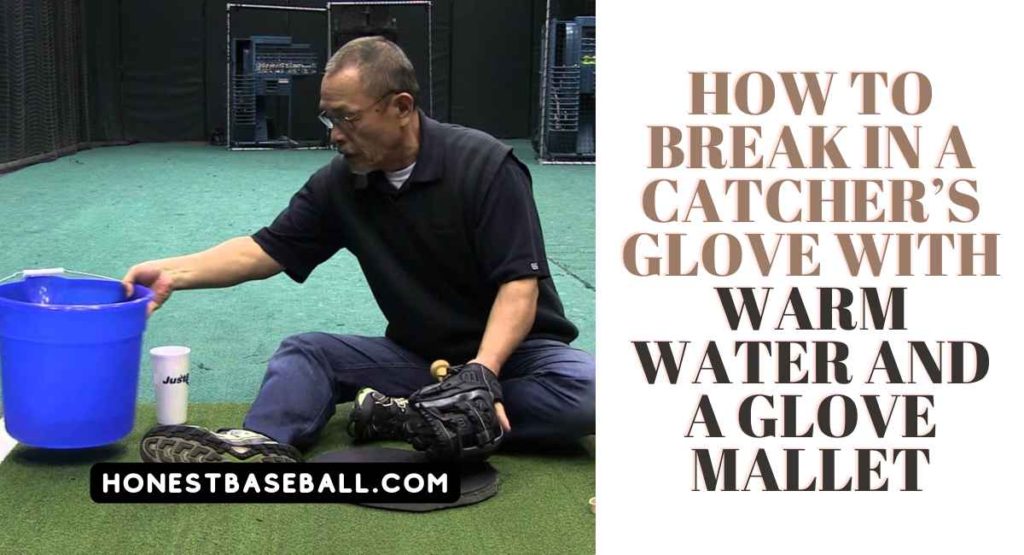
How to Break in a Catcher’s Glove with Warm Water and a Glove Mallet
In the previous point, I have written a slow but best method. And now I will show you the quickest way for breaking in a Catcher’s mitt. This is also known as an unnatural way to break in. But to apply this method, try to be careful. Otherwise, you can ruin the leather quality.
And before starting the process, please note that this way, you can play a maximum of three seasons with this new glove. It is best to apply this method on a cheap Baseball glove because a premium quality glove must have extra care and must last for more seasons.
Things you need for this Break in method
First, you need a bucket full of warm water. The temperature should be in the hundred and fifty to seventy degrees Fahrenheit max.
Then you will require a cup to pour the water. A carpet as a soft surface will work best to place while you apply pressure on it. A sponge to rub the surface with warm water. And finally, a glove’s Hammar (known as Mallet). You can find it in a local sporting goods store. It is one of the most important pieces of equipment for break-in a glove.
Step 01: Pouring warm water on the Mitt
To increase its moisture and make it loosen up ( to make it soft in simple) – Pour warm water on it. And be sure to pour the water from the fingertip side of the mitt.
Do not dip it into the water bucket. The warm water will start its softening process.
When the glove becomes a bit wet, start applying the pressure. Always put the highest pressure on the part you will catch the ball. Because this is the necessary and closest surface, you will bend to catch the ball.
Step 02: Using the Glove Hammer
Here, you are going to use the glove hammer for the pressure. Start from one point of the glove and start hammering with enough force. And keep doing it all over the mitt’s surface for two times only. And be careful, do not abuse the hammering. Be gentle.
If you can not find a Mallet, you can use a Baseball bat.
Step 03: Soak and Dry
Now, use a sponge and soak it in warm water. Start the hot water rubbing all over the mitt. Do not leave any point to rub. Later keep it in an open and dry place and let it dry naturally.
Step 04: Hammer all the Way
The next day, it is time to hammer again after they dry out. From the top of the fingertip of the mitt to the end of every surface. Then fold it to (centered in the middle) and gently rub it against each surface. Use the hammer, place it in the center of the mitt, and roll it. Then pressing it.
Keep repeating the same course till you get a perfect hand pocket. You will have to properly break Catcher’s mitt in three to four days maximum.
How to Break In a Catcher’s Mitt with Hot Water and Free Hand Pressure

In this process, you pour the warm water on the glove. And put pressure with your bare hand.
For this technique, most of us follow Mr. Shigeaki Aso. He was also known as the glove master.
Step 01: Pouring the Warm Water
First, pour some warm water into the glove pocket. And also, pour on the outside surface. Overall, this will help increase the moisture and make the mitt soft.
Step 02: Squeeze the Catcher’s Mitt
Now, place the mitt before you (face the back of the glove to you). And with both hands, grab the two corners of the mitt and start to squash it to the center. Keep squeezing in and out. And after a while, you will feel that it starts to feel softer and softer.
Step 03: Stretching the Mitt
After the squeezing, this mitt needs a stretch now. Place it on your lap or a soft surface. Then start pulling the finger pocket and laces of the glove. You may see that the laces are starting to loosen up. But no need to worry. After drying out, it will be fixed automatically. Just do not stretch it too much.
After that, just let the mitt dry out naturally. And finally, you will get an average quality break-in but in the quickest way possible. Now, this glove can give you a maximum of two seasons of support. Later, when you will play catch the catcher’s bag will be getting its perfect form.
Do you know how to break-in an outfielder’s glove? If you do not know, read this article || Wilson A2000 Outfielder’s glove break in
How to Break in a Catcher’s Mitt by Steaming
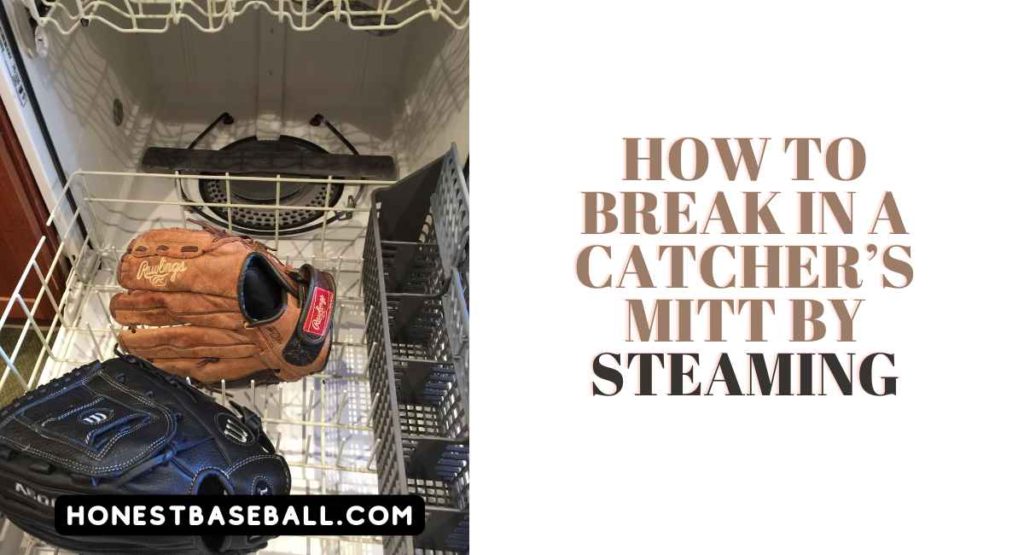
See, for a break in a mitt, steaming can be a straightforward and quick process. But in the process, you can ruin the whole glove. Many companies like Wilson do not offer a warranty if you use a steaming method for a glove break-in.
So, if you want to break in a glove using a steaming method, then it is going to be a wise choice to apply it on a cheap glove and use expert help for the break-in.
The Steaming Process in Brief
- To start the steaming process, first, apply a special glove conditioner. This will help the leather be softened evenly and in a better way.
- Later they will put it into a steamer to make it soft and malleable.
- After bathing the glove for enough time in the steamer, they will take it out and use a wooden mallet to hammer it on the main surface areas.
- Then they will keep hammering until it gets a perfect pocket for the player’s hand.
Finally, you will have a break-in. And do not expect to use this glove for more than one season (even if you just play catch). However, you will have it a game ready against a nice pitch in one day.
Know which is the best glove || Wilson A2K VS A2000
How to Break In a Catcher’s Mitt with Conditioner

For a glove, breaking in with a conditioner can be helpful. But do not use any conditioner without research. Use those which are approved to use on gloves.
Before starting the process, remember that it is very controversial for a Baseball glove to chime in. It may seem to work very fast and efficiently. But this can also increase the weight of the glove and its durability.
If you still want to apply this method, follow the rules carefully-
Step 01: Apply the Conditioner to the Glove
Please use a sponge to apply the conditioner. The sponge helps to distribute the conditioner evenly on the surface.
Try to apply the conditioner to every surface of the Baseball glove and wipe the extra conditioner away so it will not get sticky.
Make a light coating on the surface and rub it with a sponge or a clean cloth (a wool cloth can work best). Again do not use too much conditioner, which can ruin the whole glove. And no need to apply the conditioner on the webbing.
Then let the conditioner dry out. Then the glove will soften. However, it will not have any form.
Step 02: Giving it a Shape
For your grip shape, place a ball in the pocket of the glove (where you will catch it). And wrap the rest of the glove around it (the ball must be in the correct position). Moreover, to apply additional pressure, tie a rope or rubber bands around it.
Please leave it in a dry place for a day. This will help the conditioner to be more stable. And the ball will help to form the basic shape.
Step 03: Open the Glove and Use a Mallet to Hammer
The next day, untie the rope or rubber bands and remove the ball. Now, use a glove hammer to hammer on the catching point.
First, put on the glove and use the mallet to beat the catching surface (Simulate the catching) for at least ten minutes. And make sure to hammer the stiffer area more to make it lose a bit for further shaping. But always put the focus on where you are going to catch the ball.
And when you are done hammering the glove, rewrap it with the ball again.
After the previous process, start using it in the field. And keep using the mallet until you are satisfied with the break-in. A pitching machine can help you to make a quick formation.
Do not do the following to Break in a Catcher’s Mitt
Previously, I have shown you the best way and some controversial ways to break a glove. But never apply the following methods for a break-in. These will ruin your glove and will not help you anyway (according to many reviews and data).
No. 01: Putting the Mitt under Microwave and Cooking it
We use a microwave oven for heating or preparing food. But for leather, it is brutal.
See, a microwave oven’s heat makes the air dry. And this is going to kill the leather’s moisture. I suggested increasing the humidity on every break-in method you saw in the beginning. But here, the situation is going to be the opposite.
This way, the glove will be so dry that it can become very fragile without being softened.
No. 02: Applying Shaving Cream on the Glove
Once, the shaving creams were rich in Lanolin called natural oil. The Lanolin-based cream worked very well on gloves. But recently, the producers of shaving cream do not use Lanolin anymore.
This is an older method and was kind of popular back then.
Producers use mostly harmful chemicals as a cheap substitute for this natural ingredient. Now, if you use shaving cream, it will increase the dryness and kill the natural moisture. And some cream can break the glove.
Overall it may seem good for softening a glove but does not work that way.
No. 03: Putting the Glove Under Your Mattress
I showed you how to apply some conditioner and then wrap it with a ball. But this also follows the wrapping of a ball (closed position) in the pocket without the conditioner part. And you leave it under your mattress and sleep on it.
And the result can shock you. This mattress method will give it quick pressure, which can destroy the basic shape of the glove.
Overall, you will have a disastrous break-in if you are putting it under your mattress.
No. 04: Do not Drive on Your Catcher’s Mitt
Do you think you can drive a car on it under a catcher’s mitt and get its proper shape?
Driving a car on your lovely new Baseball glove will destroy it. It will only be a terrible idea.
No. 05: Do not leave it in the Car Either
When you leave a car in the Sun, it acts like an oven. And you know what happens when you leave it in an oven.
No. 06 Do not use any Kind of Oils (Not even Olive Oil)
See, oil can soften your glove’s leather. But it will increase the weight and make it sticky. Moreover, it will make it sticky, slippery, and unevenly heavy. And it is also not a proper break-in method.
Read the article to know the differences among Wilson A series || A1000 vs A2000 || A900 vs A 1000
Frequently Asked Questions
Should you steam a Catcher’s Mitt?
ANSWER: Well, if you want a quick way for breaking in and do not care about the lifetime. Then you can steam a catcher’s mitt. But in the end, I will suggest you not use this method as it is not an ideal way to chime in a glove.
Wrap up Thoughts
Well, or your new catcher’s mitt or any position’s glove, the best way to break in is to play catch with it. The more you use it, the more it gets the perfect form. And the ideal pocket for the catch.
I hope this article clears every aspect and tips on how to break in a Catcher’s Mitt. Good luck with your future games.
Related Topics
7 Best Oils for Baseball Gloves
Baseball Gloves for Seven Years Old Boys
Where Wilson Baseball Gloves are Made in
Best Baseball Gloves under One Hundred Dollars

Hello everyone. My name is Jason Butler, and I live in California, America. I was a professional AAA Minor League Baseball player. I lost my chance of playing MLB for injury issues, but I did not lose my love for baseball. I attended the coaching training program and am now working as a coach in a small school in San Diego.
I always love to share my experience and knowledge if that can help you. Play baseball, and stay fit.