You have probably seen the viral “life hacks” online telling you to throw your sweaty baseball cap into the top rack of the dishwasher, or toss it in the washing machine on the delicate cycle. Let me save you the heartbreak right now: Do not do this.
I have seen countless players ruin their favorite, perfectly broken-in hats by trusting these shortcuts. Here is what actually happens:
- The Dishwasher Disaster: Dishwashers use extremely high heat and harsh, bleach-based detergents designed to strip baked-on grease from plates. This intense environment will completely bleach the color out of your hat and can literally warp the plastic brim inside.
- The Washing Machine Trap: Even if you use cold water and the “delicate” cycle, the tumbling and agitation of a washing machine will crush the structured front panels (the crown) of your hat. It will come out looking like a deflated, wrinkled balloon.
Coach Butler’s Golden Rule of Hat Care: “If you love your cap, you wash it by hand. Period.”
Hand-washing is the only method that gives you complete control over the shape, the color, and the fabric. It takes a little more effort, but it guarantees your cap survives to see another season. Before we get to the soap and water, however, there is one crucial test you must perform to ensure water won’t ruin your hat entirely.
The “Tap Test”: The Make-or-Break Step Before Water Hits Your Hat
Before you even think about turning on the faucet, you must determine what the brim (the visor) of your hat is made of. This single step dictates how you can safely wash your cap.
If your hat was manufactured before 1983, or if it is a true vintage piece, the brim is almost certainly made of tightly compressed cardboard. If you submerge a cardboard brim in water, it will instantly turn to mush, permanently ruining the shape of the hat.
Modern caps (post-1983) generally use a durable plastic insert that can easily withstand a good soaking.
If you aren’t sure how old your hat is or what is inside the brim, you need to perform the Tap Test.
How to do the Tap Test:
- Hold the brim of the cap between your thumb and index finger.
- Tap firmly on the top of the bill with your fingernail.
- Listen closely to the sound.
- The Hollow Thud: If it sounds dull and hollow, and the brim feels slightly thick and easy to bend or warp, it is Cardboard. Do not submerge this hat in water. You must use the “Spot Cleaning” method.
- The Sharp Click: If it sounds sharp, hard, and metallic, and the brim resists bending, it is Plastic. You are safe to proceed with a full sink soak.
Coach Butler’s “Honest” Tip: “When in doubt, always assume it’s cardboard. It is better to spend an extra 10 minutes spot-cleaning a dirty hat than 10 seconds destroying a classic one.”
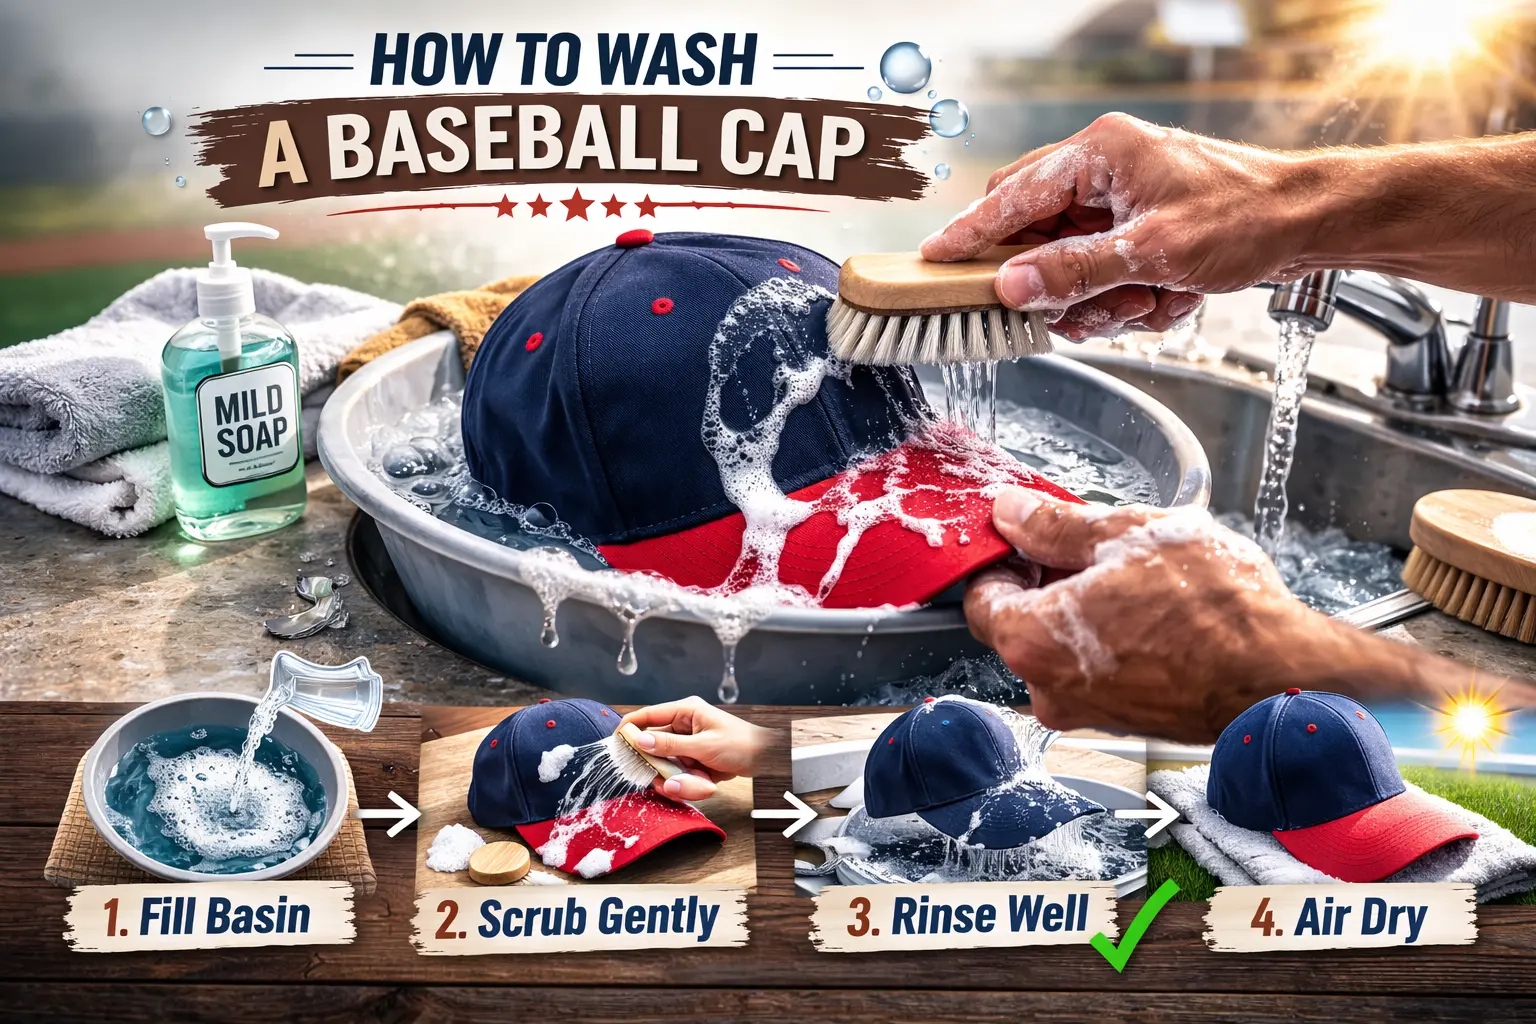
The 3 Master Washing Methods
Now that you have completed the Tap Test and know exactly what your brim is made of, it is time to clean. Forget the washing machine. Depending on your hat’s material and how dirty it is, choose one of these three proven hand-washing methods.
Method 1: Spot Cleaning (For Vintage, Cardboard, & Wool Caps)
If your hat failed the Tap Test (cardboard brim) or is made of delicate wool, do not submerge it in water. Soaking these materials will ruin the shape and cause the wool to shrink.
The Setup: Mix one cup of cool water with a few drops of mild, bleach-free laundry detergent.
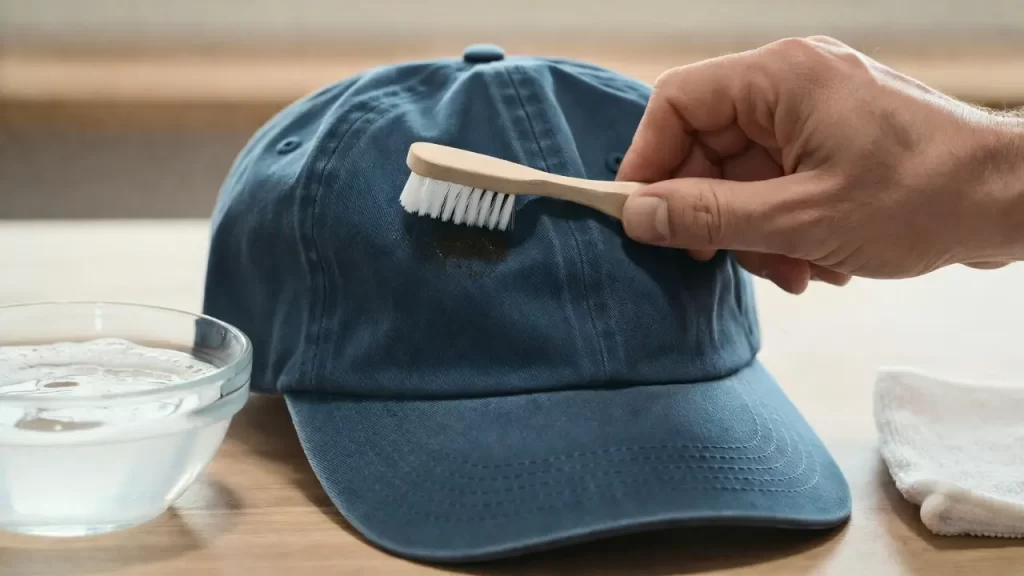
The Scrub: Dip a soft-bristled toothbrush into the soapy water. Gently scrub the stained areas using small, circular motions.
The Wipe Down: Take a clean microfiber cloth, dampen it slightly with plain cold water, and wipe away the soapy residue.
Air Dry: Let the hat sit in a well-ventilated area away from direct sunlight.
Method 2: The 30-Minute Sink Soak (For Regular Cotton/Polyester Caps)
If your cap passed the Tap Test (plastic brim) and just needs a seasonal refresh to remove dust and light sweat, this is your go-to method.
The Bath: Fill a clean sink or basin with lukewarm water (never hot, as hot water fades colors). Add one tablespoon of mild laundry detergent and agitate the water until it’s soapy.
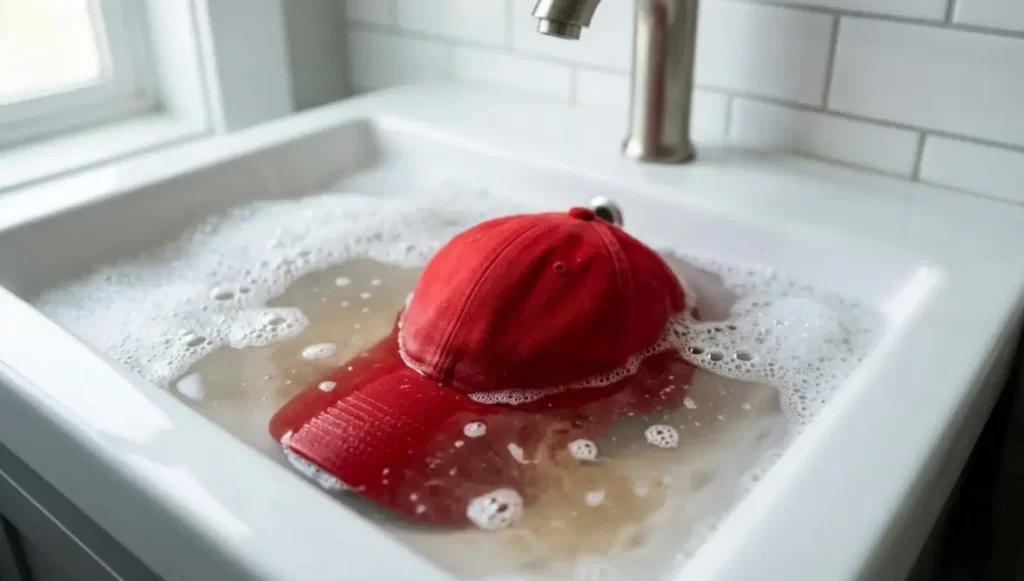
The Soak: Submerge the entire baseball cap into the water. Let it soak undisturbed for 30 to 45 minutes. You will likely see the water turn murky as the embedded dirt lifts out.
The Rinse: Drain the dirty water. Rinse the hat thoroughly under cool, running water until all the soap bubbles are gone.
The Squeeze: Never wring or twist the hat. Gently press the fabric between a clean towel to absorb the excess water without crushing the crown.
Method 3: The “Sweat-Stain Nuke” (For Stubborn Yellow Sweatbands)
If your favorite hat has deep, crusty yellow sweat stains baked into the inner band and the front panels, a simple soak won’t work. Sweat contains proteins and oils that require a specific chemical breakdown.
The Paste: Create a thick paste using either Color-Safe OxiClean and water, or a mixture of Baking Soda and White Vinegar.
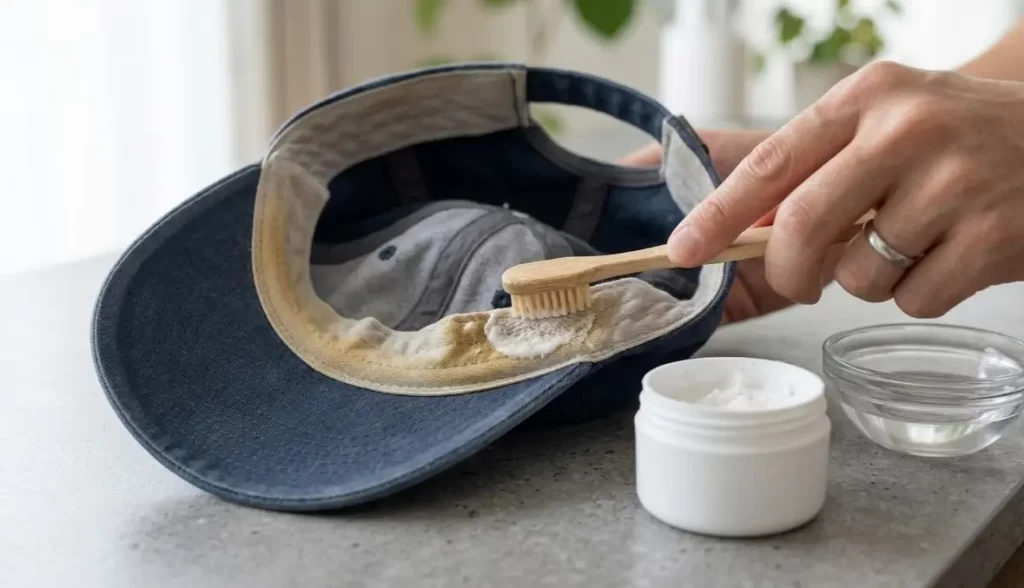
The Application: Use a toothbrush to scrub this paste directly into the stained sweatband and the affected areas on the fabric.
Let it Sit: Allow the paste to sit and break down the sweat enzymes for 15 to 20 minutes.
The Finish: Once the time is up, drop the hat directly into the sink and proceed with Method 2 (The 30-Minute Soak) to wash away the paste and the lifted stains.
Coach Butler’s “Honest” Insight: “When scrubbing the front panels of your cap with a toothbrush, be incredibly gentle. Scrubbing too aggressively will cause the fabric threads to fray, making the hat look fuzzy and worn out.”
Cap Washing Matchmaker – Choose Best Method For You
Find the safest way to wash your specific hat without ruining its shape.
The Perfect Drying Hack (How to Keep the Shape)
You have successfully washed your cap, and it looks brand new. But if you dry it incorrectly, all that hard work is ruined.
Here is the Honest Truth: throwing a wet hat into the clothes dryer is a death sentence. The extreme heat will shrink the fabric, warp the brim, and melt any glue holding the panels together. Leaving it outside in direct, baking sunlight will instantly fade the colors.
To dry your cap like a pro, you must support the front structured panels (the crown) so it doesn’t collapse on itself while drying.
3 Pro Hacks for Drying a Baseball Cap:
- The Coffee Can / Bowl Trick: Find a coffee can, a melon, or a medium-sized bowl from your kitchen. Turn the bowl upside down and place the wet hat over it. This perfectly mimics the shape of a human head and keeps the crown standing tall.
- The Towel Stuffing Method: If you don’t have a bowl the right size, simply ball up a small, clean hand towel and stuff it firmly inside the crown of the hat. Set the hat on a dry towel in a well-ventilated room.
- The “Custom Fit” Method: If you don’t mind a damp head, simply put the wet hat on and wear it around the house until it dries. As the fabric dries, it will perfectly mold and shrink to the exact shape and size of your head.
Coach Butler’s “Honest” Insight: “Never clip a wet hat to a clothesline by its brim or its back strap. Gravity will pull the heavy, wet fabric down, stretching it out and leaving permanent clip marks. Always dry it resting flat on a surface with the crown supported.”
How Often Should You Clean Baseball Caps?
If you use your baseball cap regularly, giving it thoroughly every few months might help maintain its clean and tidy appearance. However, before you begin, you should first read the label found on the inner of the hat that indicates the fiber composition.
This tag should also contain the washing recommendations provided by the manufacturer. Caps created before 1983 did not need labels. Therefore you may have to study the care information.
In the world of fashion, baseball hats are often considered to be trends. It is up to you to make a statement with your choice of headgear and to impress your teammates along the way. These are the 18 Coolest Baseball Caps That Will Enhance Your Fashion Trends In 2026.
How to Wash a Baseball Cap in a Washing Machine
You can wash most baseball caps in a washer and then dry them naturally in the air. If you do a lot of sweat work like working out, yard work, or sun protection, then you can choose a washing machine for washing baseball caps as the best option.
Getting ready to play baseball throughout the summer? Your preparation is not complete unless you get yourself eyewear. The sunglasses improve your field of vision. These are the Best Baseball Sunglasses and the 14 Best Youth Baseball Sunglasses to get you prepared for your next summertime game.
What You’ll Need
- A stain treatment ingredient
- Liquid or mild detergent
- Hand towel
Step 1: Apply Stain Remover on the Cap Surface
A pre-treatment with a stain-removal chemical may be necessary before laundry baseball caps since they are usually not cleaned often.
Pretreating protein stains like mud, dirt, grass, or perspiration using an enzymatic mixture like Stain Remover is recommended. Using rubbing alcohol or stain remover is an effective method for removing makeup stains. Detergents also work well in this regard.
Step 2: Rinse and Spin with Like-Items
Do not put your baseball cap in a cage-like cover while washing it in the machine. Instead, wash it with other things or on its own. ‘Like items’ could include socks, underwear, light sleepers, and other small garments.
Ball caps should not be washed with heavy or bulky things such as slacks, sweaters, or comforters since the weight might crush the hat and cause it to lose its shape.
Step 3: Run the Thorough Cycle
Rinse your hat in tepid water and use the mild or slow option on the washing machine. It ensures that it stays in good condition even after being washed repeatedly.
Step 4: Air-Dry and Reshape
Now that you have reached this point in the article, I will let you in on a little-known fact. The key to preserving the form of your baseball hat after washing it lies in how you allow it to dry.
Instead of using a machine to dry your cap, let it air dry with the crown reshaped by putting a clean towel that has been balled up.
Washing a Baseball Cap: A General Guide
Do not place caps in the washing machine or the dryer while doing the laundry. That is not what you ought to do. A washer operation rack designed for maximum efficiency.
Due to the high heat and chlorine often used in dishwasher soaps, your cap could be damaged throughout the washing and drying process. It is recommended to wash the cap by hand to maintain its color and form for as long as possible.
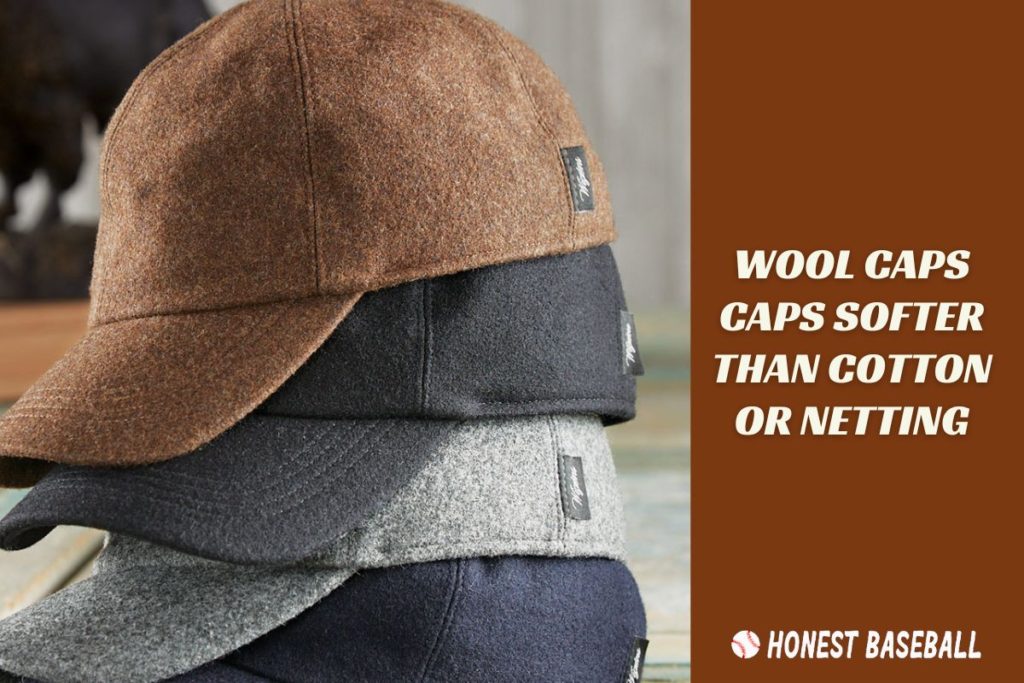
Tips for Cleaning Wool Hats
Wool headwear is more sensitive than other types, such as cotton or netting. For example, the AoM cap has been withdrawn; if you have one, you should hang on to it since it is now considered a vintage collectible item! Wool caps require a bit more special care and attention while being cleaned.
Instead of using a regular soap or washing solution, look for something developed particularly for wool. Soak the wool according to the instructions given above.
Be very delicate while cleaning; if you are rough, the wool will mat and resemble felt. That is definitely not something you look for.
And last but not least, while drying the hat, first remove any extra moisture by pressing it dry with a towel. You may feel some discomfort as a result.
However, it will apparently fit your head. It is essential to exercise caution while washing your wool hats since they tend to lose their form very quickly.
Tips for Cleaning Older Hats
If you are using your dad’s baseball cap and it is more than 20 years old, it is likely to be made using raw objects. These materials are less sturdy than those used in the production of hats nowadays, bill and cap both. You would not believe this, but bills had to be manufactured out of cardboard, not the more flexible polymers used nowadays.
The first step in cleaning your old hat is to check its shade. There are several hats on the market now that are color-resistant, which means how many times you wash them, they keep their original color.
However, this is not always the case with old caps. To see whether it works, dab a cloth with a tiny bit of cleanser and run it down the bottom of the bill.
If you see colors coming out as soon as you clean it, do not clean the cap other than water. If you see otherwise, you are free to use the soap or detergent.
If you are unclear about the bill’s fabric, you should only wash it on the spot. Old cardboard bills can be damaged if you submerge them in water.
Simply said, hats are not as long-lasting as they were back in days. So you have to work a little extra on these antique baseball caps. Make use of a compact scrubber, and then clean the affected areas by hand.
Storing Baseball Caps
To avoid the accumulation of dust and grime, commemorative caps must be maintained in a sealed container. They need little more than a once-yearly gentle brushing or cleaning to maintain their cleanliness.
For autographed caps, store them in an air-conditioned, dark place to avoid fading and mold and mildew from developing. Less valuable hats may be stored in your wardrobe inside cotton or plastic storage bins, cotton bags, or pillowcases.
If you transport the hat in a container or luggage, be sure that it does not get squeezed in any way since this will damage its contour. Caps should be kept somewhere free from direct sun, heat, and moisture when not in use.
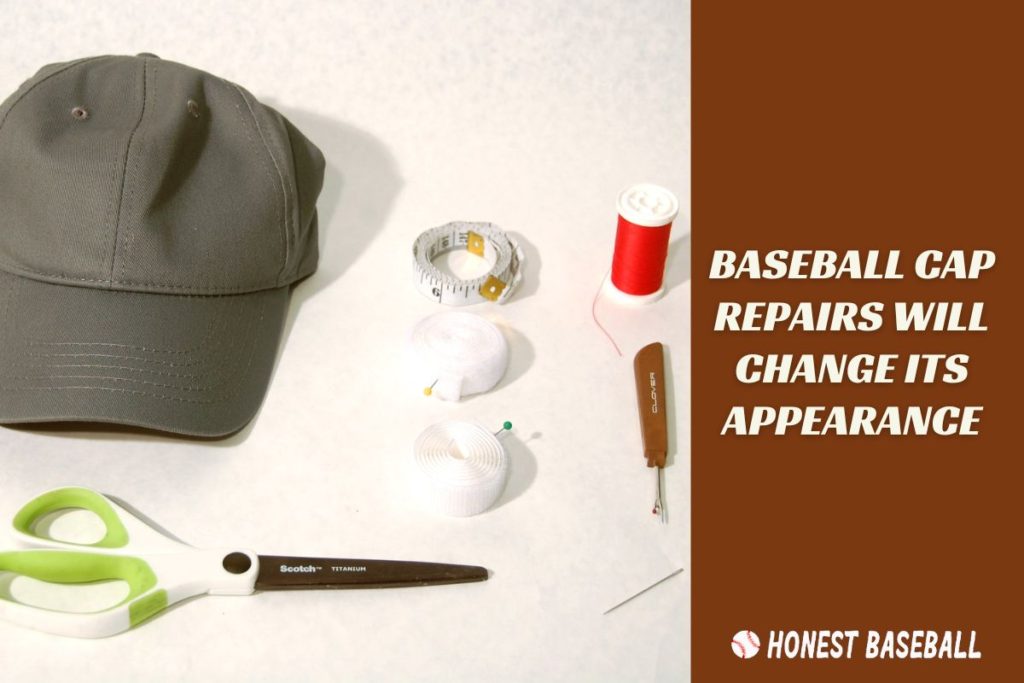
Repairing Baseball Cap
If your cap’s shredded bill edges become an issue, you can patch them back together. However, your cap will not look the same. Adding adhesive to a commemorative hat can also significantly change its price.
Using a tiny quantity of glue, put it to the frayed edges and press down the material to straighten it out. On the other hand, since the glue dissolves, it can leave a mark on the cloth. It will not be visible after you wash the cap.
Use super glue and velcro strips as replacement closures if the stubs on your plastic hat adjustment break. A tailor or hat repair shop can fix rips and other defects on antique or commemorative caps.
Do the wrinkles on your baseball cap irritate you? I feel super annoyed by the wrinkles. Here you can get to know How To Fix A Wrinkled Baseball Cap For Longer Use.
Cleaning a Baseball Cap: What Not to Do
While you may theoretically clean your headgear in the washer, you should avoid doing so. Your caps do not need to be cleaned in extreme ways. At worst, you will wind up with a radically deformed hat and a complete disaster.
Some baseball hats cannot be cleaned in the manner covered in this article. Caps with a soft brim may disintegrate if they are drenched and dried in improper shape. The ideal cleaning method for hats like this is the dry cleaning process.
Frequently Asked Questions
1. Is It Safe to Wash a Baseball Cap in the Washing Machine?
As long as the baseball hats do not include cardboard or paper bills, they can usually be washed in the washing machine. Knit hats, as well as straw hats, may also need to be cleaned, mainly if they are used outside to shelter your face from the sun.
2. How Do I Get Rid of Sweat Stains on My Hat?
Brush the stain gently with a soft-bristled brush, a paste made from 1/4 cup of water, and four teaspoons of baking soda. You should give the headwear a rest for approximately an hour.
Apply a misting of white vinegar that has been distilled, and briefly scrape the discoloration. To ensure cleanliness, rinse well in ice water.
3. What Kind of Soap Do You Use to Wash a Hat in the Dishwasher?
Put your cap on the highest rack of the dishwasher when you wash it. You can better preserve the hat’s shape by using a hat form. Dishwasher cycles may be conducted in low-heat settings with a mild wash.
Let the hat dry in the open air. The only thing you have to watch out for is that it does not include citric acid or bleach.
4. How Do You Clean a Hat With Baking Soda?
Brush the stain gently with a soft-bristled toothbrush and a paste made from 1/4 cup of water and four teaspoons of baking soda. Give the hat at least half an hour to rest before removing it. Spritz the discoloration with distilled white vinegar, then give it a quick scrape. Cleanse thoroughly with ice water.
5. Can I Use Vinegar to Clean My Hat?
If your hat is filthy and smelly, give the dirty parts a pre-treatment with white vinegar by sprinkling it on them. Allow the vinegar to sit and absorb the water for about ten minutes. Spot clean the brim by dusting the baking soda on the sweat spots.
Final Words
Baseball hats are often ignored and not cleaned in the appropriate manner. The right headwear can help you perform better on the field. As a baseball player, cleaning them is your responsibility. So, you need to know how to wash a baseball cap.
No matter the technique, you can get a clean baseball cap with a thorough wash and air drying. The most crucial thing to remember is to use mild soap and cool water.
The detergent makes the colors of the garment more vibrant. You will also see that the stains on the bill of the Playoffs cap have nearly disappeared. They are still noticeable but much better than before.
If your treasured baseball cap is dirty from summertime sweat, hand-wash it to prolong its lifespan.
Hello everyone. My name is Jason Butler, and I live in California, America. I was a professional AAA Minor League Baseball player. I lost my chance of playing MLB for injury issues, but I did not lose my love for baseball. I attended the coaching training program and am now working as a coach in a small school in San Diego.
I always love to share my experience and knowledge if that can help you. Play baseball, and stay fit.