Picture this: It’s the bottom of the last inning, the game is tied, and a routine ground ball is hit straight at you. The crowd holds its breath. There is no worse feeling in baseball than feeling the breeze of that ball rolling right between your legs (the dreaded “five-hole”) and into the outfield for a game-losing error.
Whether you are a Little League starter or a high school varsity prospect, fielding a ground ball cleanly is the most fundamental—and most psychological—skill in baseball. It’s not just about bending over; it’s about rhythm, angles, and soft hands.
The 5-Step Ground Ball Sequence: To field a ground ball perfectly every single time, elite infielders rely on a strict, unbreakable 5-step sequence:
- The Creep (Pre-Pitch): Taking two small steps toward the home plate as the pitcher winds up to get your momentum moving forward.
- The Approach: Reading the speed of the ball and taking the right angle to cut it off.
- The Breakdown: Chopping your steps and widening your base as you get within 10 feet of the ball.
- The Catch & Funnel: Receiving the ball out in front of your body with “soft hands” and bringing it safely to the center of your chest.
- The Throw: Re-aligning your footwork instantly to fire a strike to the base.
Coach Butler’s “Honest” Insight: “The biggest mistake I see young infielders make is waiting for the ball to play them, instead of them playing the ball. If you stay flat-footed and wait for a grounder to reach you, it will find a bad hop and eat you alive. You have to attack the ball aggressively but under control.”
What Is a Ground Ball?
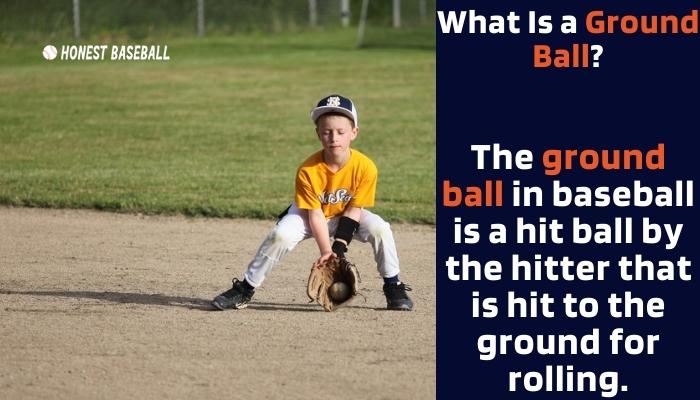
The ground ball in baseball is a hit ball by the hitter that is hit to the ground for rolling. The objective of the ground ball is to send it to the outfield by bouncing or rolling.
On the other hand, the fly ball is hit into the air with a high arching trajectory, while the ground ball is hit straight down.
On the other hand, a grounder is not the same thing as a line drive, which refers to a shot that is basically hit in a straight line.
You will mostly see a ground ball hit on the upper part of the ball. Baseball players find the ground ball easy to field, among other hit balls.
Anything can happen with a ground ball, and it even can be a double play with a baserunner on the first base. Also, an unexpected bounce or fast rolling may also advance for the baserunners.
Fast runners and batters with less power tend to score runs readily by hitting ground balls. An infield ground ball can result in one run. You might occasionally bring a double or more through the first or third base.
A ground ball might result in a home run inside the park. Therefore, anything is possible with a ground ball.
Bad Hop Ground Ball
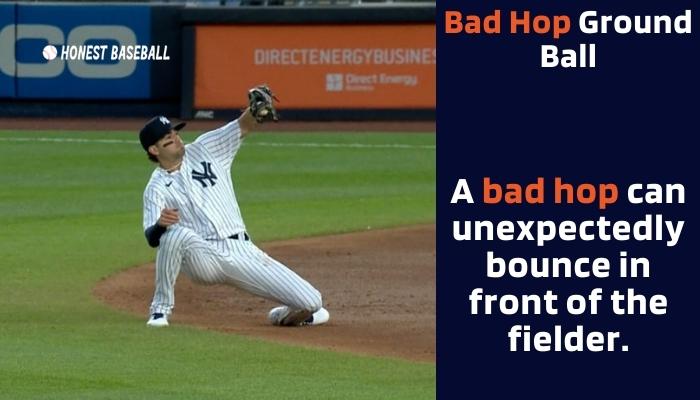
Your body position might be at the perfect angle, but unfortunately, the ground ball can get an unexpected and sudden bounce that changes its direction. This unexpected bouncy ground ball is called a bad hop.
When you are learning to field ground balls, you must keep the reality of bad hops in mind so you are never caught off-guard.
Why do bad hops happen?
- Imperfect Dirt: The infield surface is rarely perfectly smooth. A tiny pebble or uneven dirt can change the ball’s trajectory instantly.
- Extraordinary Spin: How the batter hits the ball can put a wicked topspin or sidespin on it, causing it to kick left or right upon bouncing.
How to Survive a Bad Hop: If the ball takes a bad hop right in front of you, rely on your athletic stance and quick reflexes. Do not turn your head away or pull your glove back. Keep your body in front of the ball to block it, ensuring it stays in the infield so you still have a chance to make the play.
How to Field a Ground Ball?- The Techniques
Now you know what is a ground ball and bad hops? So, what next?
Now comes the thing of knowing how to field ground balls.
Here are several precise suggestions and tips from me with those which you can masterly craft the fielding of grounders.
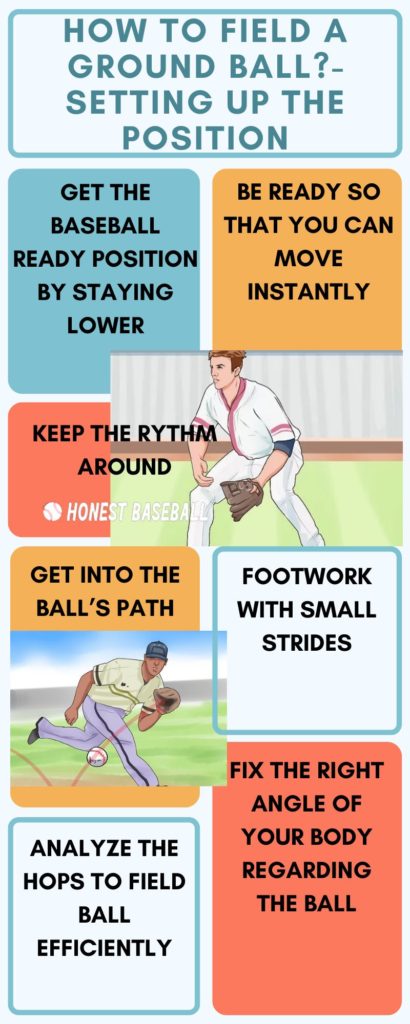
Setting Up Your Position
The first step in learning how to field a ground ball is setting up your proper fielding position. The relaxed position is the first aspect that will prepare you to catch a wild or slow roller ground ball.
Here are the tips for setting up your body and foot positioning.
Step 01: Get the Baseball Ready Position By Staying Lower
In bat-ball games like cricket and baseball, the starting fielding position is one of the most effective aspects for the fielders.
You must get the ready position before the pitcher pitches the ball. Stay low with the knee and foot positioning by slightly bending your knees.
Stay low on the bent knees with an athletic position so that you get a better view of the field. This lower athletic position of power is more reliable in meeting the ball than any other awkward position.
Step 02: Be Ready So that You Can Move Instantly
Baseball fielding is like doing duty in Army. You have to be alert at any time to respond. So, be ready whenever the ball may come to you. You will get very few moments to react to the hit ball.
Enhance your reflex action, and keep your body motioned by shifting the weight from left to right, right to the left.
Making a “V” angle by your body could be an efficient way to move instantly. It helps you to keep a balance position on the ground.
Also, directly facing the batter in such a position will enhance your vision toward the batter and the hit ball. This also helps you to make sure of an accurate throw as well.
Step 03: Keep the Rythm Around
Keep your rhythm on. As I mentioned already, do left-side move, right move, and field the ball. The constant and balanced moving will keep your body ready for the instant motion to catch the ground balls.
This will also help you to get a perfect position too.
Step 04: Get Into the Ball’s Path
As long as you are in your rhythm, it’s quite easy to get into the hit ball’s path. While the ball is hit, get into its path as fast as possible. Make sure you move through the right angle.
Here are some tips and scenarios that you may face to run into the hit ball’s path.
- If the hit ball is comparatively slower, you can directly move to it as fast as possible. With this strategy, you can catch the ball fast.
- If you see the ball hit harder but comes lower, you should fast movie here too. It is because to prevent any unexpected bounce of the ball so that it cannot happen any injury.
- If the ball is very fast, don’t run toward it directly. Rather take a side to reach the ball. Make sure you reach the ball from the safest side.
By the way, it’s all about practice and drilling. You will be habituated to the positions when you have a lot of practice.
Step 05: Footwork with Small Strides
Do you know how your footwork impacts the entire fielding process when it comes to learn how to field a ground ball? Footwork is the most advanced technique to master the fielding of the ball with ease.
The right foot positioning ensures your body’s acceleration and direction.
However, the smaller your strides, the more comfortable you are with moving because longer stride rates longer distance between your foot, and it creates complex situations.
On the other hand, smaller strides help you to accelerate fluid motion.
Step 06: Analyze the Hops to Field Ball Efficiently
I think you remember the bad hops I mentioned earlier. As you see, a grounder can bounce anytime on the surface in front of you. So, your best try should be to catch the ball as long as it hops once.
The next hope could be a bad hop and deceive you not to field the ball. Your athlete stance might be able to handle the wrong center of gravity(!).
Try your best not to let the ball bounce in front of your glove.
- Catch the ball after it bounces once or twice a few feet away from you. But make sure the ball can’t hop immediately in front of your glove.
If the ball even bounces normally in front of you, make sure you reflex as quickly as possible. The quick reflex will help you to try another time if you miss the ball the first time.
So you know, the hop analysis is too much essential to field a ground ball rightly.
Step 07: Fix the Right Angle of Your Body Regarding the Ball
You can get more comfortable if you keep your glove hand to the ball’s side. For more clear understanding, if you are a right-hand fielder (catching the ball with your right hand and throwing the ball with your left hand), allow the ball to come to your right side.
In contrast, if you are a left-handed catcher, you should allow the ball to come to the left side of your body. This placement makes it easier to reliably field the ball in the circumstance.
Keep yourself at a distance from the ball that eliminates the need to dive or stretch out your body. Except under very unusual circumstances, this shouldn’t ever take place.
Fielding the Ball
You are set with the proper fielding position with your athletic stance. Now it’s time to wait for the ball and grab it when it comes.
This fielding the ball step should be mastered appropriately to grab the ball inside your glove.
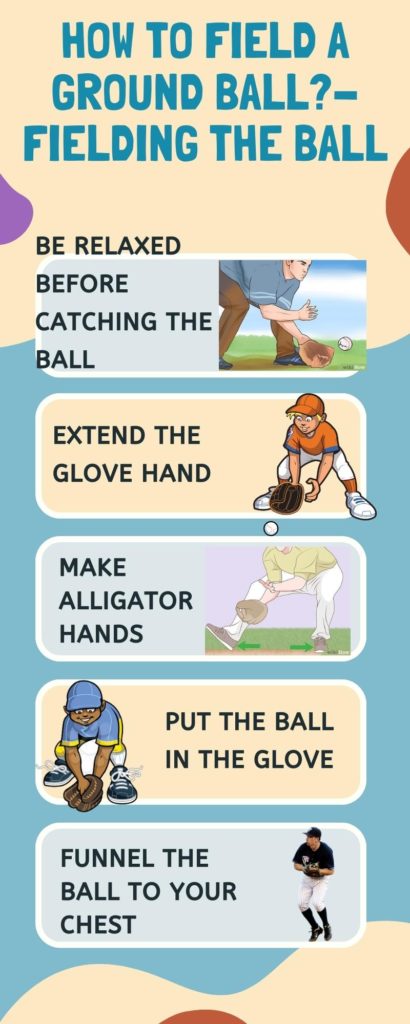
Step 1: Be Relaxed Before Catching the Ball
Being mentally strong is the most important aspect of both fielding and batting. If you are new, I believe you might have a little hesitation and uncertainty.
Don’t let your fear get the best of you. That’s my advice. Maintain a confident and calm demeanor before going out onto the baseball field and while you are there. Hands and feet that are relaxed are more effective.
If you are scared, your hands and feet could be stiffer, which will bring no result at all.
Step 2: Extend the Glove Hand
Avoid having the ball pass between your feet at all costs. Make yourself lower by bending your knees, and ensure that your body’s back is resting on the ground or very close to it.
If the ball passes through both of your feet while you’re fielding it, it will be the most humiliating blunder possible.
Step 3: Make Alligator Hands
Extend your glove hand in front of you and keep the hand on the ground perpendicularly. Make alligator hands by putting your ungloved hand over the gloved hand.
Maintain a position with your glove on the ground so the ball may enter it by rolling or jumping.
It is essential to keep the glove in your hand in terms of how to field a ground ball. When it is necessary, you can simply p the hand. If you maintain the hand in the air, though, it can be difficult to get rid of it.
Step 4: Put the Ball in the Glove
Keep your eyes on the ball it’s coming. Be ready to grab the ball until the last moment. Put your hand perpendicularly on the ground and allow the ball slightly inside your glove.
The glove even may bounce on your glove. So, don’t create the chance. Just confine the ball with other hands as fast as possible. Now close the glove tightly so that security is ensured.
step 05: Funnel the Ball to Your Chest
After grabbing the ball tightly, now funnel the ball to your chest. This state creates the perfect position to throw the ball to the base you want to. The center of gravity is balanced on your feet, bringing balance to your body.
Also, your hands are in a good position to throw the ball as fast as possible.
Throwing the Ball to the Base
Now it’s time to throw the ball to a baseman to tag out a baserunner or keep them close to the base so they can’t make a run.
By the way, you also have to go through some precise states when you are transferring and throwing the ball. For these actions in baseball fielding, keep the ball with ease in your hand.
1. Don’t Hurry While Throwing the Ball

After getting the ball into your hands, your first task is not to be rushed. Many newcomers can’t control themselves and be rushed. As a result, the ball might not go to the right place after throwing.
By the way, you should be faster and throw fast. But keep control of yourself. You can rather step ahead of some steps to the base you are throwing.
2. Transfer the Ball From the Gloved Hand to the Throwing Hand
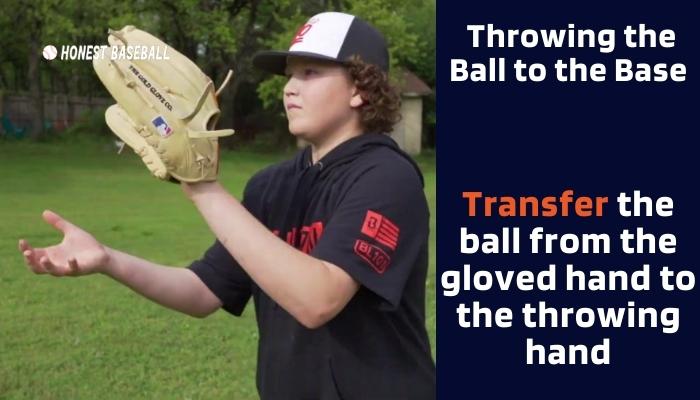
While the situation is under your control, transfer the grasped ball from the gloved hand to your throwing hand. It is easy to transfer the ball as you are ready to do this.
Just grasp the ball with your throwing hand.
Now, you must practice a lot for a natural grip to grasp the ball from the gloved hand. Practice transferring the ball without looking at it. This tactic will help you to get a fluid reflection on transferring the ball.
Aside from this, you must practice quickness in transferring the ball. For this, practice fast transferring as much as possible. You can do this anywhere, even when you are in the dugout with no tasks.
3. Adjusting the Throwing Position
After transferring the ball to the throwing hand, you must go into the throwing position as quickly as possible. You have to work with the foot position now.
- Rise up the front foot, and land it on the ground. Then rise the behind foot as well and land. Again rise up the front foot for throwing. Do it sequentially without any flaws.
- The entire process with the right motions makes your body ready for the position of power to throw the ball.
4. Throw the Ball
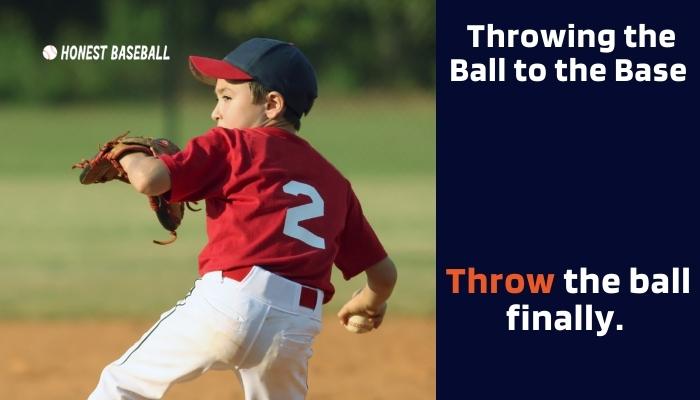
Now you are all set to throw the ball. The last thing you must keep in your mind is focus. Focus on the target to make a perfect throw of the ball to the player.
A rushed throw will bring good for nothing. So, be focused and concentrated. Throw the ball with fluid motion.
- You need proper practice to develop advanced techniques for an accurate throw. For this, fielding drills are a must. I will discuss some efficient fielding drills ahead.
Some Additional Tips for Fielding a Grounder
Different coaches have different strategies to teach their students to field a grounder. They have different theories about the glove and foot position.
But, I generally love to follow the typical stance that is already proven.
Glove Position
Basically, you should follow the position of your gloves, as mentioned earlier. Aside from this, for convenience, professional players also field the ball on their left side (right-hand-throwers), and right side (left-hand-throwers).
Because I throw with my right hand, I almost always use my left hand to grab the ball as it comes in under my left shoulder. Just as it does for other pros, this works well for me.
There is no question that this strategy has the potential to be an excellent one at the professional level and for playing rapid fielding.
Foot Position
I don’t maintain my legs parallel. It will make catching the ball more difficult because of this. In most situations, I try to position my left foot such that it is somewhat behind my right foot.
This provides me with more comfort as well as room to adjust my body in different ways. In addition, the position of my legs does not provide any difficulty while fielding the ball. In the end, this makes it simpler to catch the ball.
Challenges of This Position
Fielding in this manner presents a bit of a difficulty for you since you throw with your right hand. You must twist your body counterclockwise to approach the base from where you want to toss the ball.
Here I mentioned anticlockwise. Do you know the reason why? Because it will allow you to maintain the momentum of your move and because it takes less time to turn completely.
It is time to toss the ball after completely rotating to the first base.
Some Drills for Improving Technique to Field a Grounder
Drills are the backbone of any physical task. To improve your grounder fielding skill, you should go through these regular drills under the supervision of your coach.
1. The “2-Minute” Ready Position Drill The ready position helps you respond instantly toward the hit ball.
- How it works: The coach supervises this drill in a group of at least 10 players. The players hold their bent-knee athletic stance for 2 solid minutes, followed by 2 minutes of rest.
- The Goal: Doing this cycle at least 10 times in a single session builds muscle memory and endurance, so the stance becomes second nature.
2. The On-Knee Fielding Drill Youngsters generally make the mistake of keeping their hands between their legs, making them miss the ball.
- How it works: Players get down on their knees, easing their vision forward. The coach throws or hits a ground ball, and the fielder must keep their hands out in front to catch it.
- The Goal: This is an essential drill for youths to master extending their hands forward rather than fielding deep.
3. The Goalie Box Challenge This is one of my favorite drills to implement. The purpose is to make players capable of keeping ground balls in front of them, acting like a hockey goalie.
- How it works: Create groups of 5 players. The coach sets up a “goalie box” using buckets or baseball hats. The coach stands 30 to 40 feet away and fires the ball (hitting off a tee or throwing).
- The Goal: Players in the goalie box use their athletic stance to field or block the ball. A round of 20 hits per player pushes them to their limits and builds incredible reflexes.
Related Read: Baseball drills for 10 years olds.
Frequently Asked Questions
1. What are the 3 proper techniques for fielding a ground ball?
The three main techniques to field a ground ball are setting up the position, fielding the ball, and throwing the ball. To master these three steps, there are several steps to craft as well.
2. What position is best for fielding a ground ball?
The weight on the bent knee, lower buttocks, and outstretched hands are the best position for fielding ground ball.
3. Do you close your glove when fielding a ground ball?
Don’t close the glove. Rather, keep the glove in front of you so that you have a clear vision, and the ball can easily enter the glove. After grasping, the ball, use the throwing hand to confine the glove area and transfer the ball to the throwing hand.
Final Note
So, it is a matter of pactice and mental strength to learn how to field a ground ball. The more you practice, the more you will master the techniques.
The most essential point to remember is that you should constantly try to model your behavior after the fundamental approaches. The phrase “don’t reinvent the wheel” is a well-known aphorism.
In passing, I’d like to mention that developing your fielding talent will be facilitated by adequate practice, as well as focus.
Other Posts You Also May Like:
How To Clean Baseball Batting Gloves To Keep Them Safe And Long Lasting
How To Increase Pitching Velocity By 10 MPH | 25 Proven Tips
How To Stop Arm Barring Baseball | Everything You Need To Know
How To Practice Pitching Alone For Baseball?
How To Play Baseball | Everything You Need To Know
Hello everyone. My name is Jason Butler, and I live in California, America. I was a professional AAA Minor League Baseball player. I lost my chance of playing MLB for injury issues, but I did not lose my love for baseball. I attended the coaching training program and am now working as a coach in a small school in San Diego.
I always love to share my experience and knowledge if that can help you. Play baseball, and stay fit.