
. If you’re a baseball fan, you may want to showcase your baseball bat collection on your wall. Hanging your bats is a great way to display your love for the sport, show off your achievements, or decorate your room with a sporty theme.
But those dreams get stuck if you don’t know where to start. In brief, you can use wooden baseball wall mounts, brackets, hooks and display cases to hang your bats on the wall.
I’ve also shared a quick guide on making a baseball bat hanger with PVC pipe in the FAQ section.
In this article, I’ll walk you through the step-by-step process of hanging baseball bats on your wall. I’m gonna discuss the followings:
- 4 types of mounting systems to hang your baseball bats on walls
- How to hang your baseball bats on the wall
- How to make your DIY baseball bat hanger (with wood)
- How to make your PVC baseball bat hanger
4 Types of Mounting Systems to Hang Your Baseball Bats on Walls
If you’re looking for a way to display your best baseball bats on the wall, there are a few options you can consider. Let me give you a brief idea about them:
Wall-Mount for Hanging Baseball Bats
First, you can use a wall mount designed specifically for baseball bats. These mounts are usually made of metal or plastic and have a curved shape that fits the bat perfectly. This is a great option if you want a clean and polished look.
Baseball Bat Hooks
Another option is to use hooks. You can find hanging hooks for baseball bats online. Or else you can also use any sturdy hook that can handle the bat’s weight. Simply screw the hook into the wall and hang the bat from it.
Brackets for Baseball Bats
If hooks aren’t your thing, try brackets to hang your bat collection. These L-shaped brackets attach to the wall and cradle the bat. As mentioned before, you also need to consider the weight capacity of the brackets before purchasing.
Baseball Bat Holder Display Case
Lastly, bet on a baseball bat display case if you want to display bats protectively. These cases usually have a clear acrylic cover that protects the bat from dust and damage and can be mounted on a wall. However, they are a bit pricier than others.
How To Hang Your Baseball Bats On the Wall?
In this section, I’ll guide you regarding hanging your baseball bats on your room wall. Please note that this guide is created considering you already have a baseball hat hanger for the purpose.
So, it’s basically for helping you set up the hanger to ensure a perfect display. Let’s head into it.
Step 1: Choose Your Location
When setting up bat hangers, people prefer choosing their bedroom or drawing hall.
Bedroom if you want to keep your baseball bats close to you. And choose the drawing room if you want to show off your collection to every house guest.
The first step to hanging your baseball bats on the wall is choosing where to hang them. However, you should also consider whether the place is easily visible.
Considering the available space for the current and future bats is also a wise way to think as you may want to increase the number of collections (BTW, just to show off myself, I got 12 bats currently on my wall 🙂).
Step 2: Gather Your Supplies
Once you’ve chosen the location for your baseball bats, it’s time to gather the necessary supplies. Here’s what you’ll need:
- Baseball bats
- Wall-mounting hardware (screws and anchors)
- Drill
- Measuring tape
- Pencil
Step 3: Measure and Mark
Pick one bat first. Then measure the distance between the center of the bat’s handle with measurement tape.
Mark the location of the bat’s center on the wall with a pencil. Use your level to ensure that your marks are straight and level. Do the same for the rest of your bats.
Step 4: Install Wall-Mounting Hardware
Here comes the hard work. You need to install the wall mounts (assuming you’re using this type) at each spot you’ve marked earlier. Get a drill to do that.
For typical wall mounts, you may need to install 2 screws and anchors for each bat, one on each side of the bat’s handle. Make sure the screws and anchors are securely attached to the wall.
Step 5: Hang Your Bats
When the job is done, it’s time to hang your bats—things to be noted that in most wall mounts, you need to slide bats to anchor their position. You don’t need to make any firm pressure, as the bats should be put out easily of the wall mounts when needed.
But make sure they are set properly. Carefully slide each of your bats onto the wall-mounted hardware.
Step 6: Adjust and Level
In the final phase, you need to test the whole settings to avoid slipping your bats or the mounting unit itself.
So, after you’ve hung all of your bats, take a step back and assess the overall look of your display.
If any of the bats are crooked or not level, make necessary adjustments to ensure everything is straight and level.
How to Make a Baseball Bat Holder at Home? DIY baseball bat Wall Mount Guide
There are different ways to make a baseball bat holder depending on your preference and skill level in DIY projects. However, let’s not make it complicated to share all of them.
I’m gonna share my recent baseball bat holder project, breaking it down step-by-step with reference images.
To get started, you’ll need both material and tool support. Let’s check out the list:
Materials list
- 2 Wooden Boards
- Fine Sandpaper
- Wood Glue
- 5 Screws (2-inch)
- 2 Powlankou Screw Eyes
- Paint
Tool list
- A jigsaw and a hole saw
- A frill, bit for drill and screws
- Sander for polishing
- Tape and combination square for measurements
Step 1: Begin Sanding Wood Boards
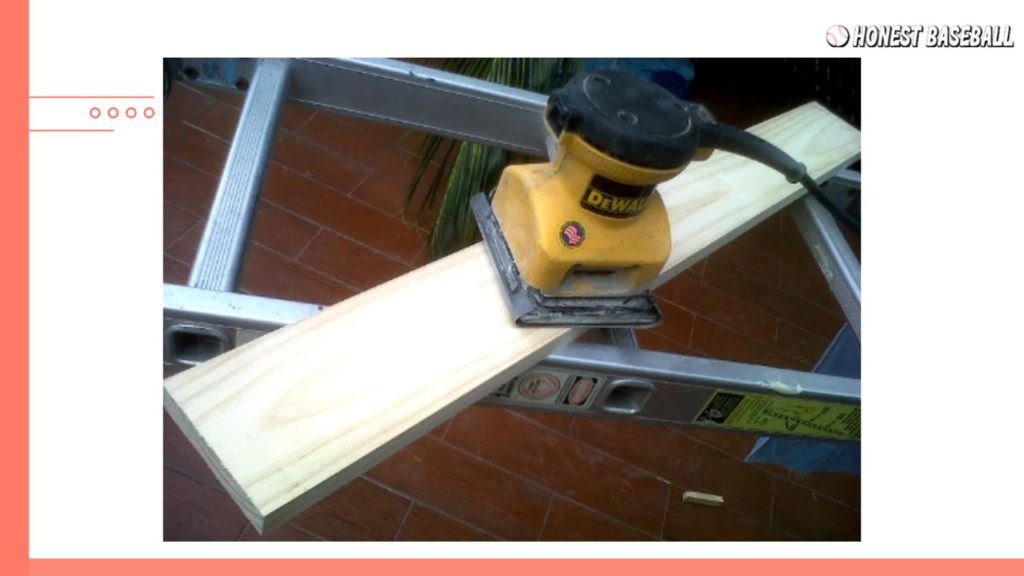
Once you get your materials, it’s time to get started! Begin by sanding the wooden boards thoroughly.
Don’t stop sanding unless you achieve a smooth and even surface. This step is essential to ensure a professional-looking finish and to prevent splinters.
Step 2: Measure and Mark on the Boards
To continue crafting your masterpiece, take a pencil and draw a straight line running down the center of one board.
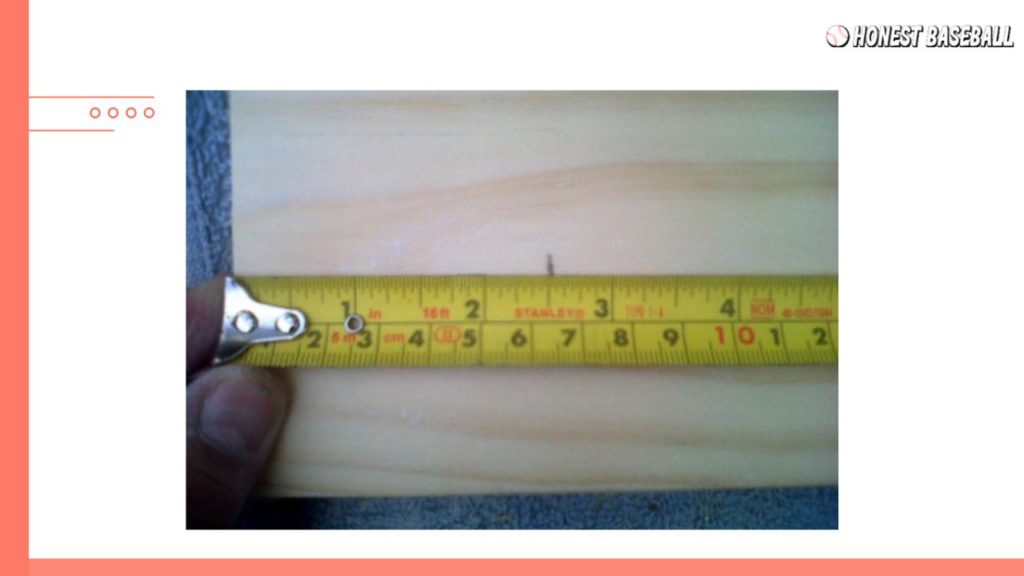
Measure 2.5 inches of distance from the board’s edge and put your first mark with the pencil (check out the photo for reference).
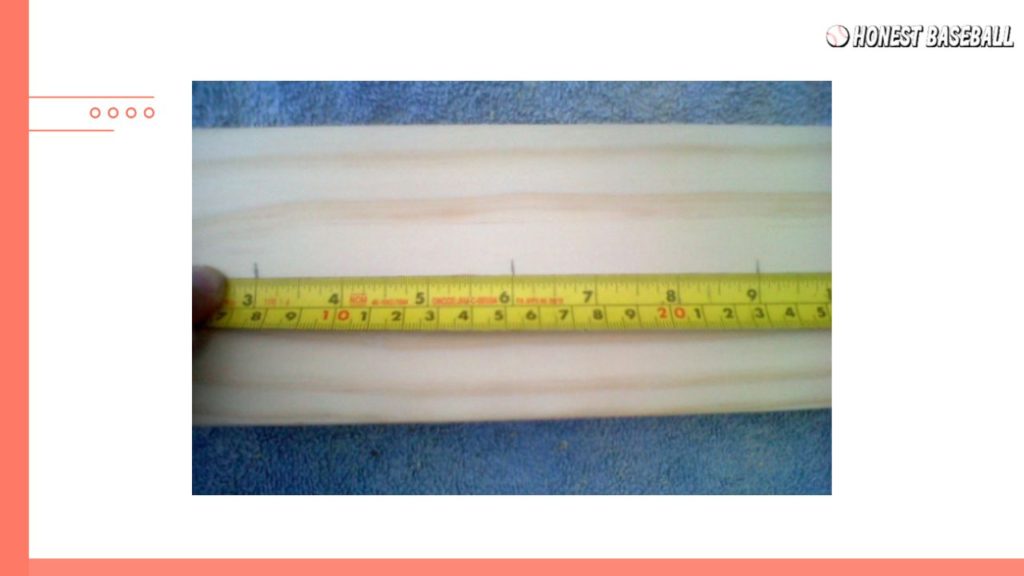
Then make multiple marks at every 3-inch interval.
Step 3: Create Holes
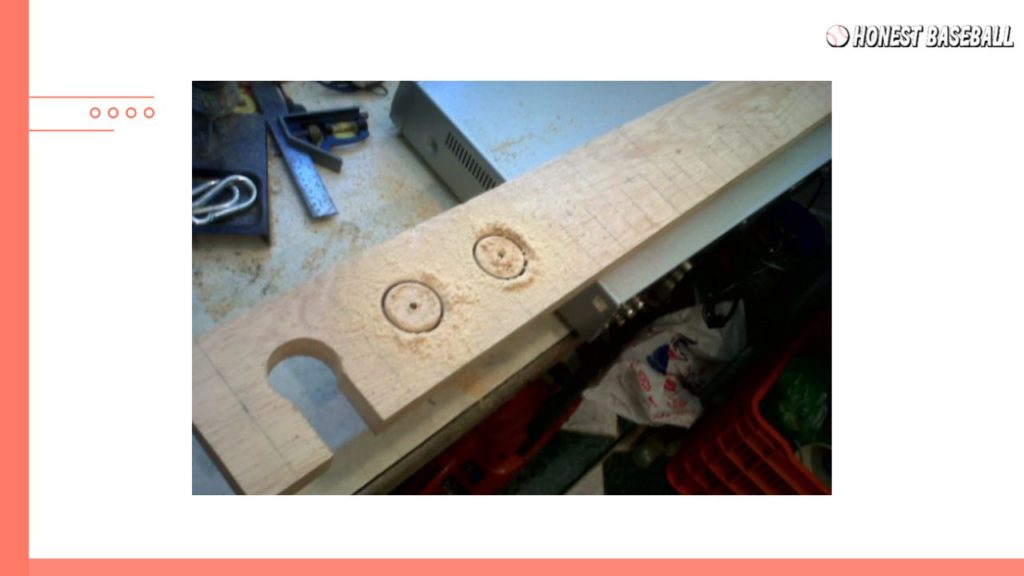
This is where you’ll need to bore each hole to create your baseball bat holder. The first thing you want to do is measure the knob’s width of your baseball bat. Once you’ve got that measurement, grab your hole saw and begin drilling the first hole on it.
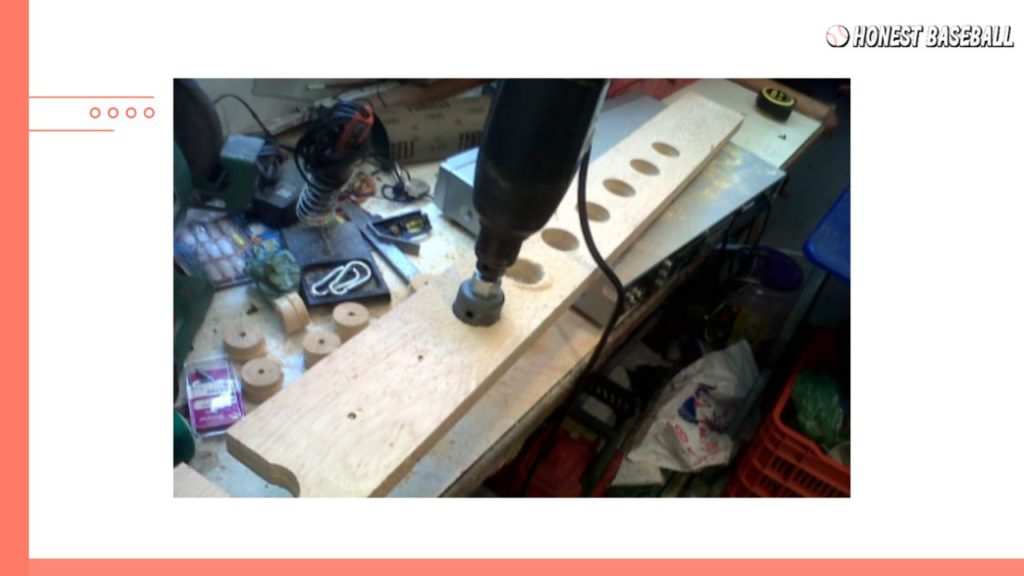
“Make sure to pick a bit that’s smaller than your bat’s knob.”
Don’t stop drilling until you see the bit’s head coming from the other side. Then, flip the board over and drill again in the same hole from the other side to achieve a smooth hole inside.
Step 4: Creating Cut-outs
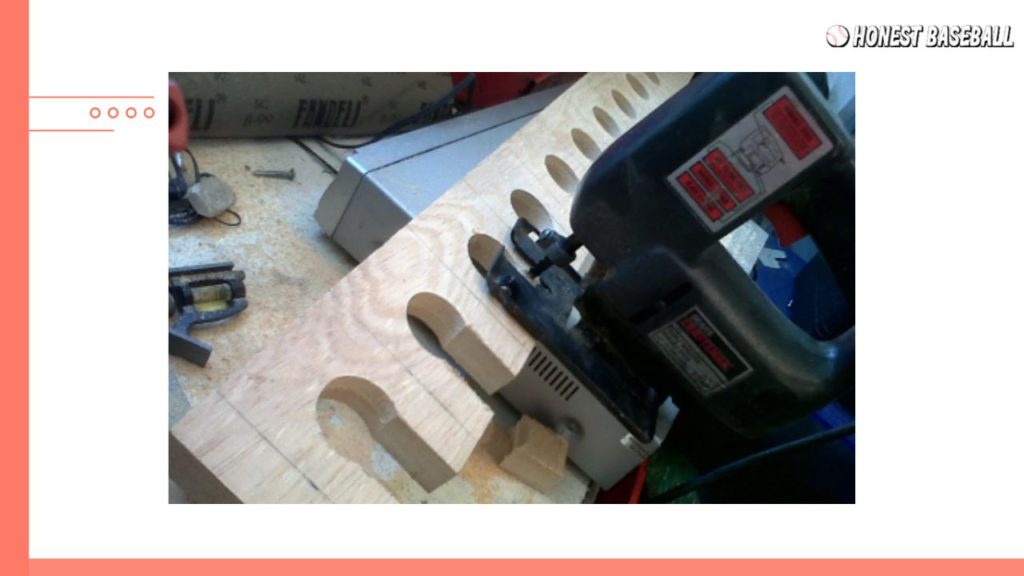
After that, you’ll want to draw 2 cut-out lines through which you’ll slide bats in. To get an idea of the width, measure the handle of your bat. As seen in the photo, the cut-out should be slightly smaller than the hole you made earlier.
“To figure out how wide the cut-out should be, just use the handle of your bat as a guide. It should be slightly smaller than the hole you made earlier. Check out the photo for a visual reference.”
After you’ve got your measurements down, it’s time to make the cuts and test them out with a bat. If everything fits perfectly, you can proceed to drill the rest of the holes.
Just flip the board halfway through each hole and drill it on the other side, as mentioned earlier. You can see how to do this in the photo.
Lastly, mark out all the leftover cut-out sections and measure them accordingly. Depending on your board size, you can fit up to 8-10 bats. You can also execute the same plan for single to double units. It’s all up to you!
Step 5: Sanding the Holes
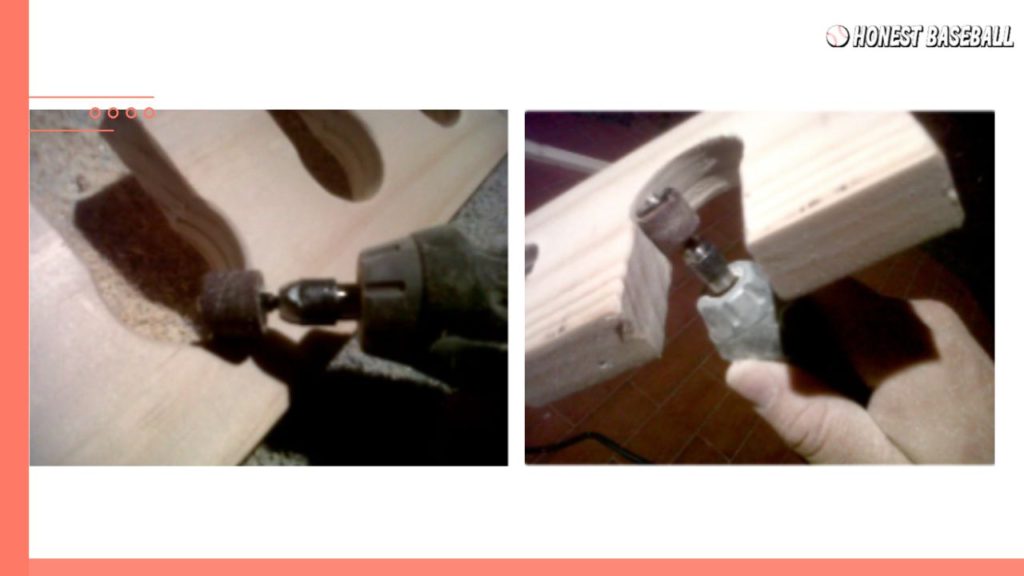
After the cut-outs are done, you need to sand down the edges of every hole and cut-out area. It becomes easier and less time-consuming with the help of a rotary tool. Make sure to do this on both sides of the board, as we’ve illustrated.
“If you don’t have one, don’t sweat it! Just grab a stake (or similar stuff) and wrap it with sandpaper. Then start sanding with your hand. However, it may take a little longer without the proper equipment.”
Step 6: Insert Screws to Assemble Parts of the Bat Holder
During this phase, you’ll need to measure any of the board’s thicknesses with the help of the combination square tool.
Once you’ve done that, mark the halfway point. Here, you’ll insert the screws.
I suggest beginning with the edges and working your way toward the center, finishing by marking the last two. This approach will help you get evenly-spaced screws.
Get some thin drill bits. Use them for pre-drilling the marked screw holes on the main board.
“Remember to drill straight because angled holes can lead to trouble when inserting the screws.”
Step 7: Attach the Boards
Once it’s done, place the other board flat on a flat table or floor with the main board positioned on top. Ensure that the boards are aligned and positioned near the edge of your workspace.
To attach the boards, start by drilling through the first existing hole at one of the edges to the other board.
Then, repeat this process with the other four holes, keeping the boards from shifting. If they move, the holes in the first board won’t align with those in the second board.
Begin by lining up the two boards. Then drill through the first hole at any edge, continuing drilling through both boards. Do the same with the rest of the holes.
“Remember, it’s imperative to keep the boards from shifting, or else you’ll end up with a wonky and uneven final product. So, be sure to steady your hands and concentrate as you bring the boards together.”
Afterward, add a small amount of adhesive to the joining area of the boards. Double-check if the boards are firmly stuck together.
Insert a screw halfway in with the help of your hand drill, drilling from the edge of the board.
Repeat the process with a new screw from the other side of the board as well. When done with the edge screws, insert the middle one and the other 2 screws.
At the last step of this phase, gently remove unnecessary glue from the board if needed. You can use a wet cloth for the purpose. Also, if required, complete a final round of sanding.
Step 8: Apply Lacquer and Set up Hardware
It’s time to mark the spots for those eye screws! Check out the image for guidance on where they go.
Proceed with pre-drilling some holes for eye screws now. While choosing the drill bit, ensure it’s thinner than your screws. Once you’re done with the drilling, insert those eye screws in.
“Keep twisting them until the threads disappear. If you need some extra elbow grease, grab a screwdriver and give it a go.”
Add some lacquer to this piece, and keep an even application layer. I suggest beginning this application in the cut-out places first. Then, move on to the surfaces.
“Don’t spray too close or else you’ll end up with a lacquer run and some ugly drips. Trust me, it’s not a good scene.”
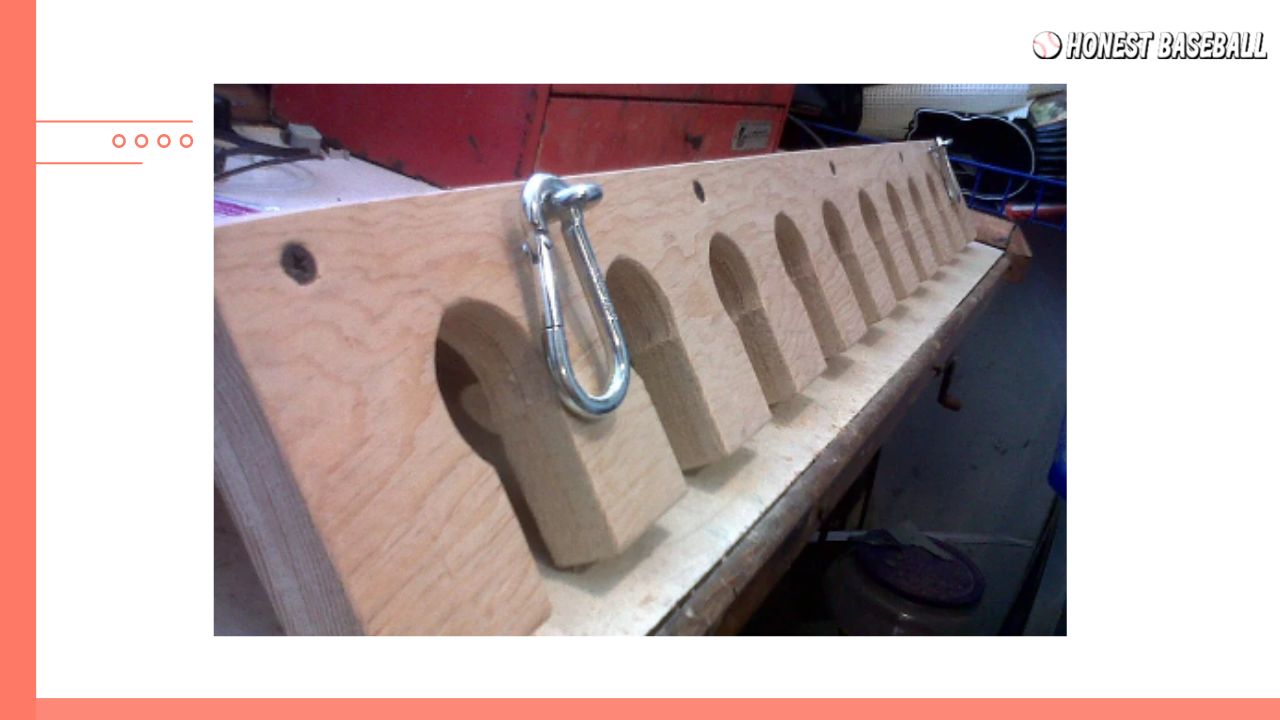
After you’re finished with the lacquer, give it some time to dry completely.
A quick tip: You may see some keeper spring links in the picture, but don’t attach them just yet. Wait until the lacquer is 100% dry before doing so.

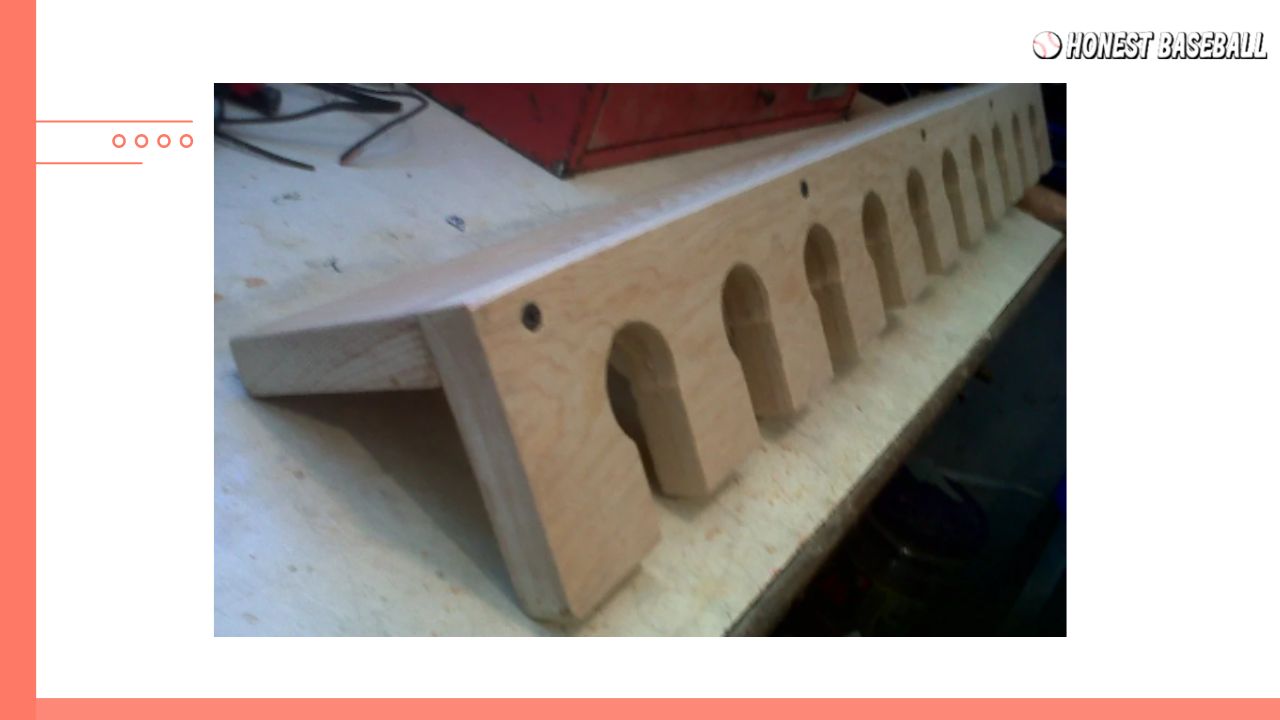
That’s a brief guide about creating a home baseball bat rack. Check out my final vertical baseball bat wall mount! I set this project on my fence. You can do the same for the home wall, also.
If you want a horizontal baseball bat wall mount tutorial, let me know in the comment.
Frequently Asked Questions
How do I hang a bat on the wall?
There are multiple ways to hang bats on the wall. For example, you can try using wall mounts, brackets, display cases and hooks.
In terms of wall mounts or cases, you can either buy one unit online or make it yourself at home with little experience with woodworking. I’ve shared the guide above.
How do you make a PVC bat holder?
Making a PVC bat holder is a fairly simple DIY project that you can do at home with a few basic materials and tools. To build this rack, you’ll need the following materials:
- 3-inch PVC pipe
- 3-inch PVC end caps
- 3-inch PVC couplings
- Drill
- Hole saw
- Tape measure
- Marker
- Hacksaw
- Sandpaper
- Carabiners
Here’s a brief guide on how to make one:

- The process involves cutting the PVC pipe into sections. Keep them approximately 12 inches long.
- Start drilling holes on one side of each pipe section using a hole saw
- Afterward, sand the edges of the holes and pipe ends to create a smooth surface.
- Then, you’ll need to attach an end cap to one end of each pipe section. To set the caps firmly, apply PVC cement or glue.
- Connect each section using couplings to create a long rack to hold all your bats.
- Lastly, attach carabiners to both ends of the rack for easy hanging.
- That’s it! You’ve now created your very own PVC bat holder.
Wrapping Up
In this article, I’ve discussed multiple cost-efficient and simple ways to hang a baseball bat on the wall, both using a readymade hanger and a DIY bat holder (made out of wood and PVC).
With a little creative mind, you can also enhance their outlook. I suggest applying paints and your favorite baseball team logos to make it more personalized and close to your heart.
I hope this article has helped you find the best option for your needs. Thank you for reading!
Check out more about baseball DIYs:
How To Break In A Baseball Glove In 5 Minutes?
How To Clean Baseballs | Keep Your Baseballs in Top Shape
Can Baseball Bats Be Used For Softball
Best Portable Pitching Mound under $100

Hello everyone. My name is Jason Butler, and I live in California, America. I was a professional AAA Minor League Baseball player. I lost my chance of playing MLB for injury issues, but I did not lose my love for baseball. I attended the coaching training program and am now working as a coach in a small school in San Diego.
I always love to share my experience and knowledge if that can help you. Play baseball, and stay fit.